|
Welcome to Skyepony's Weather Blog.
|


|
Fort Fowl going solar has been on my to do list for a few years now. In that time, kept an eye out and collected a few bits of the solar set up. A 12V 35AH deep cycle battery (like this one) was acquired on the cheap in a trade more than a year ago, the 700W inverter came to me more recently off a local scrapper's truck. After Irma with no electricity, found myself trickle charging the battery with a 5watt solar cell and hooking that to a single 12volt outlet plug, similar to what is found in a car. It was time to get this project done. Ordered one of the few available at the time, this solar kit that comprised of two 100watt panels, mounting brackets, all needed cords to connect the panels together and to the also included solar charge controller. Between all the hurricanes and long duration power outages there seemed to be a shortage at the time. The kit came late with a broken connector. With time and a little effort it eventually all arrived in working order. 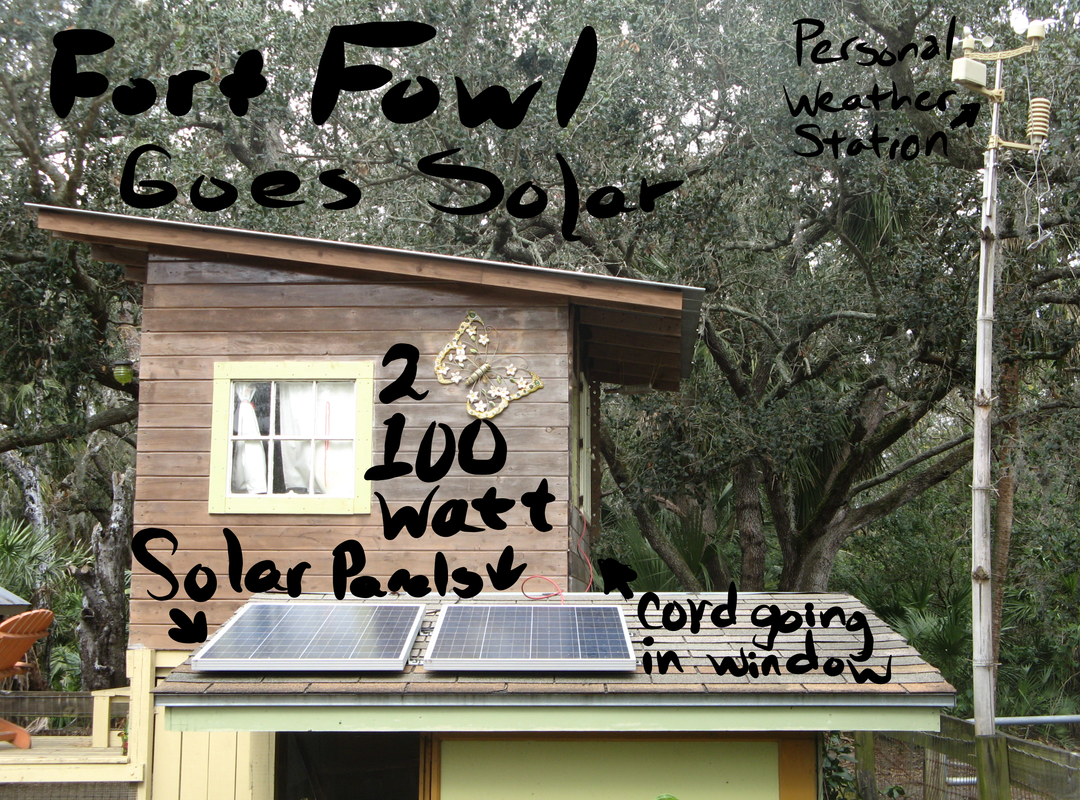 Attaching the solar panels to the hen house roof with the mounting brackets was a fairly easy task. Have yet to run the wires out of sight and tidy up this project so it seemed like the perfect time to share pictures of how this working system is put together. For now the wires from the panel are just fished in through a back window of Fort Fowl. Two 100W panels would probably be a bit of overkill if this was to just power Fort Fowl. All that is needed in there is some lights, a fan and somewhere to plug in a laptop or device. Fort Fowl is central to the whole barn area that lacked electricity. A place to plug in power tools, a vacuum pump for the bucket milker and fans for the herd and chickens would be handy. A more powerful set up could be a source of power in an outage for the house and refrigerator too. 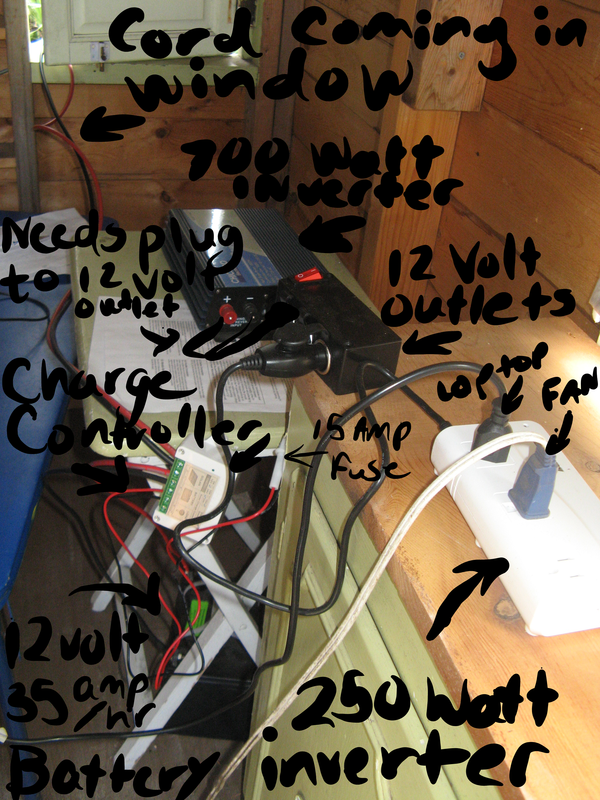 With my needs and wants assessed, went with 200W total for solar panels, 15A charge controller, that 35AH 12volt battery (may add a second one eventually) and two inverters~ one is 250W for the fort's needs and the 700watt inverter for the rest that draws more. 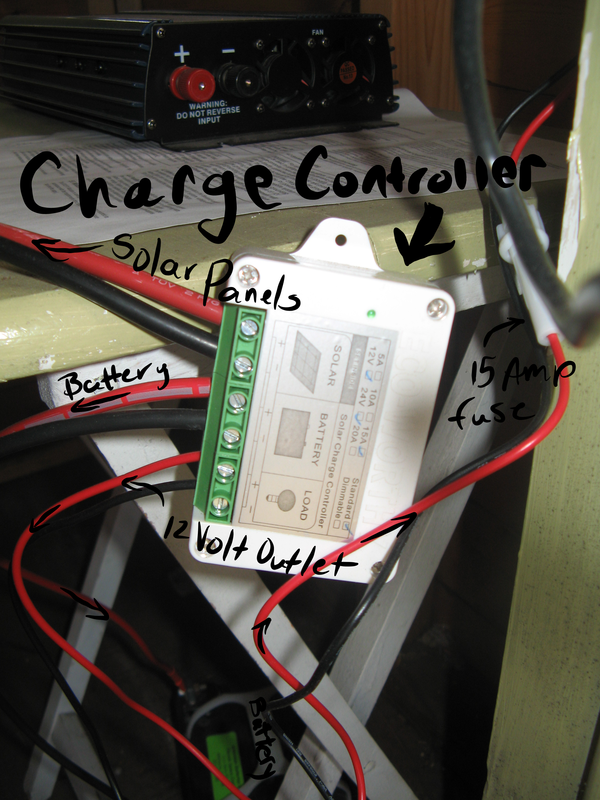 Above is a close up of the Solar Charge Controller. It's function is to tie all the parts together and keep the energy flowing in the proper directions. These are crucial to a solar generator set up, look for them to be included in a solar generator kit sized to match the panels it comes with. Read and follow all instructions, consult with a professional if this is a first larger solar project or start small and study up. The process of converting sunlight to usable electricity is fairly simple and safe, though it complicates some and has more potential to harm as a solar generator's size and power grows. 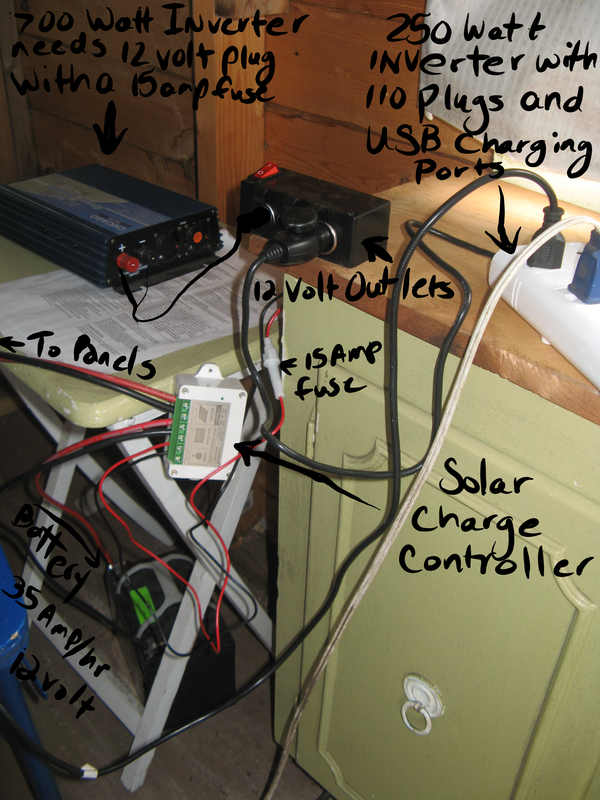 Here is another view of the wires and parts. Wires come in the window to the Solar Charge Controller which is also wired to the battery and the load.
For the load a 12V DC outlet strip with three outlets was selected. Something like this one, heavy duty with a 15 Amp fuse built in and an on/off switch. From the 12V DC outlets various 12volt devices or inverters can be plugged in. Converting 12volt DC (Direct Current) to 110 AC (Alternating Current) uses electricity and is done by an inverter. The higher watt the inverter the more is lost, so it can save to have inverters for various uses. The (actually a) 200W one selected for this set up has three 110AC outlets, four USB plugs (two 2.4A & two 1A) and an on/off switch. Soon the battery should be moving into the bottom of the kitchenette cabinet along with the charge controller. The wires coming in the window will be rerouted to come up from the bottom of the fort into the cabinet. The 12V DC outlet strip may get mounted on the side of the cabinet where inverters or a 12V extension cord can be plugged in. The 700W inverter may get put in line to a vacuum system for milking the cow. To finish off the fort upgrade will be furniture for bigger kids including some sort of craft table. The hammocks aren't going anywhere..
Comments
|
Current Tropics and Weather News..
Archives
January 2022
|
 RSS Feed
